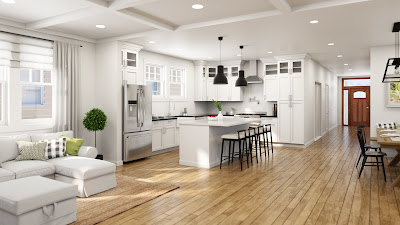
What is Photorealism?
Photorealism is a term that is used in reference to a piece of 3D art which appears to be as real as a photograph. Photorealism is important for film because CGI is being used more and more. If something doesn't look real than it can bring the audience out of the story. The point of film is to share a story with the audience. That story can make people feel things or make them think things. Either way, the audience can't be impacted by the film if it doesn't seem genuine. Most people give CGI a bad rap saying that it is ruining film. I however disagree because I think people only notice the bad CGI. The following video talks about the does and don'ts of CGI and why it should be used.
How do you create photorealistic CGI?
There are many steps to creating a realistic looking piece of CG work. In the following work there are many things that go into making the render appear to be a real photo. I'm going to be going through the essential aspects that go into creating good CGI.
Lighting
Lighting is a crucial part of realistic CGI. That is because it is in every CG scene no matter what. Everything is lit no matter what time of day or where it is, as long as you want to see it. Creating good lighting really comes down to the capability of the render engine you use within your 3D software. Where film is concerned unlike the above photo you are combining real elements with 3D elements. When doing this the most crucial part is matching light location, temperature, brightness, color, and size as best you can to the footage. Typically if your using a CG background you would composite in the real actors by keying out a green screen. If a CG object is being added in-front you might have to do some masking if anything crosses its path. One way to match lighting is with an HDRI map. Below is an HDRI map I found of the interior of a building. If you add this into the 3D scene as the background environment texture your object will reflect it. As long as your object isn't a mirror this might work well enough. However, for more accurate lighting you might need to completely recreate the environment digitally.
In the following video the youtube channel Corridor Digital recreate the environment where the CG object is as well as use an HDRI map.
Texturing
This is probably the easiest step but just as crucial as any other. to create realistic textures really all you need are two things: a texture and a normal map of that texture. The normal map tells the software where to intrude and extrude elements of the texture. this is how you get realistic light bounces when there are bumps or crevices on a surface. There is also a new function in blender called micro displacement. With a micro displacement texture you can create very detailed textures that where not possible before.
Modeling
The last and most obvious step to realistic CGI is modeling. The models are obviously anything in a scene that a texture can be placed onto. There are many tutorials on how to model as well as many different techniques. However, with the recent improvement in technology photo-scanning is becoming more common. This is when you take multiple pictures of an object from many angles and use software to piece them together. The problem is this can be an expensive and time consuming process. That is why there are still modelers who create the models. Below is a great tutorial series for modeling and texturing realistic things.
Mon - Drone Demo
Tues - Script
Wed - Script
Thurs - Modeled alley
Friday - Modeled alley


Comments
Post a Comment